
Why Weather?
Why, as a beginner should you worry about weathering your models? For that matter, why should any modeler take a perfectly fine model and make it look weathered? Good questions. Let’s tackle the first question first. Why should a beginner learn how to weather models? Because, it is a basic modeling skill. Additionally, it is actually an easy skill to learn – at least at a beginner’s level. As for the second question: “Why should any modeler weather a beautiful new model?” The answer to that is also easy. Modelers for the most part are trying to create a sense of realism on their dioramas, modules, or model railroads. A miniature ‘real’ world you might say. In the real world, brand new vehicles and structures do not stay ‘new looking’ very long. The sun, wind, and weather are all working against that.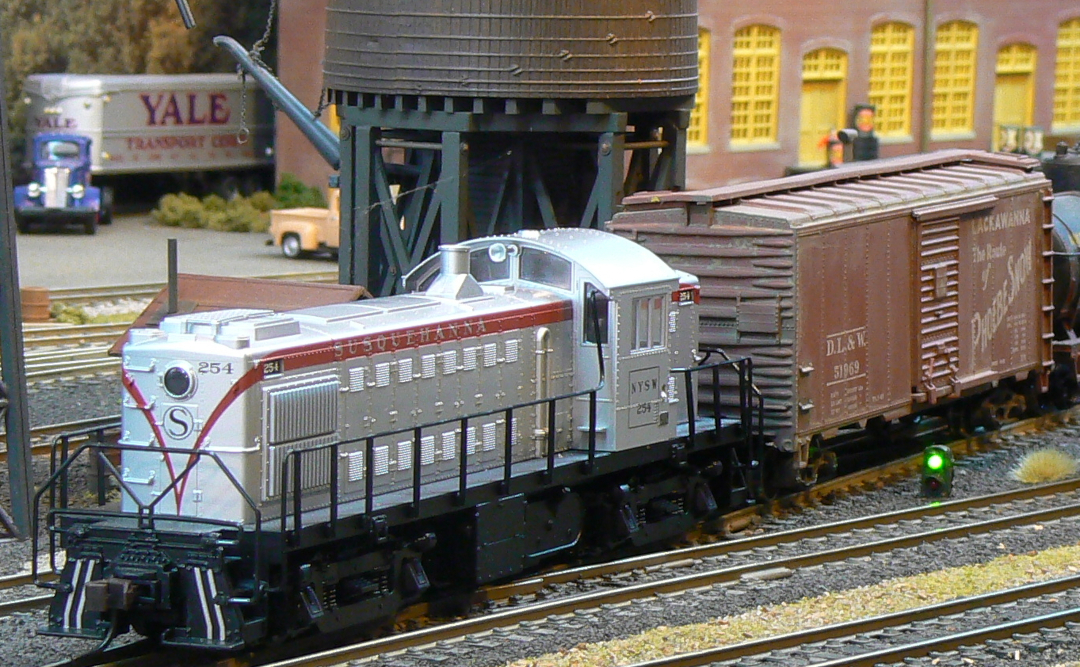
If you look at the nearby photo, you will see a beautiful NYS&W RS-1 Locomotive right out of the box from Atlas. Beautiful indeed. If you are old enough and lived in New Jersey in the 1950’s, you might have seen the Susquehanna’s RS-1’s in their silver paint scheme in action. They were filthy beasts. They probably only looked like the locomotive in the picture when they rolled out of Alco’s paint shop. By the time they arrived in the Susquehanna’s yard in Jersey City, ‘road grime’, exhaust soot, rain, etc. had already changed the look significantly. Now look at the Lackawanna boxcar behind the RS-1. It shows a modicum of weathering that took about 5 minutes and less than a dollar in supplies. It doesn’t look like a plastic model right out of the box. A sense of realism is creeping in.
Generic Weathering vs. Porotype Specific Weathering
Before going any further, a distinction should be made between ‘generic weathering’ and ‘prototype specific weathering’. Prototype specific weathering takes a photo of a specific real item – piece of rolling stock, locomotive, vehicle, structure, etc. and then replicates it as closely as possible. Every piece of rust, every water stain, every smear of soot – you get the idea. It is really a hobby within our hobby, and there are practitioners whose work will make your eyes pop! If you ever get a chance to attend a prototype modelers’ meet, do so. You will not be disappointed.
Before going any further, a distinction should be made between ‘generic weathering’ and ‘prototype specific weathering’. Prototype specific weathering takes a photo of a specific real item – piece of rolling stock, locomotive, vehicle, structure, etc. and then replicates it as closely as possible. Every piece of rust, every water stain, every smear of soot – you get the idea. It is really a hobby within our hobby, and there are practitioners whose work will make your eyes pop! If you ever get a chance to attend a prototype modelers’ meet, do so. You will not be disappointed.
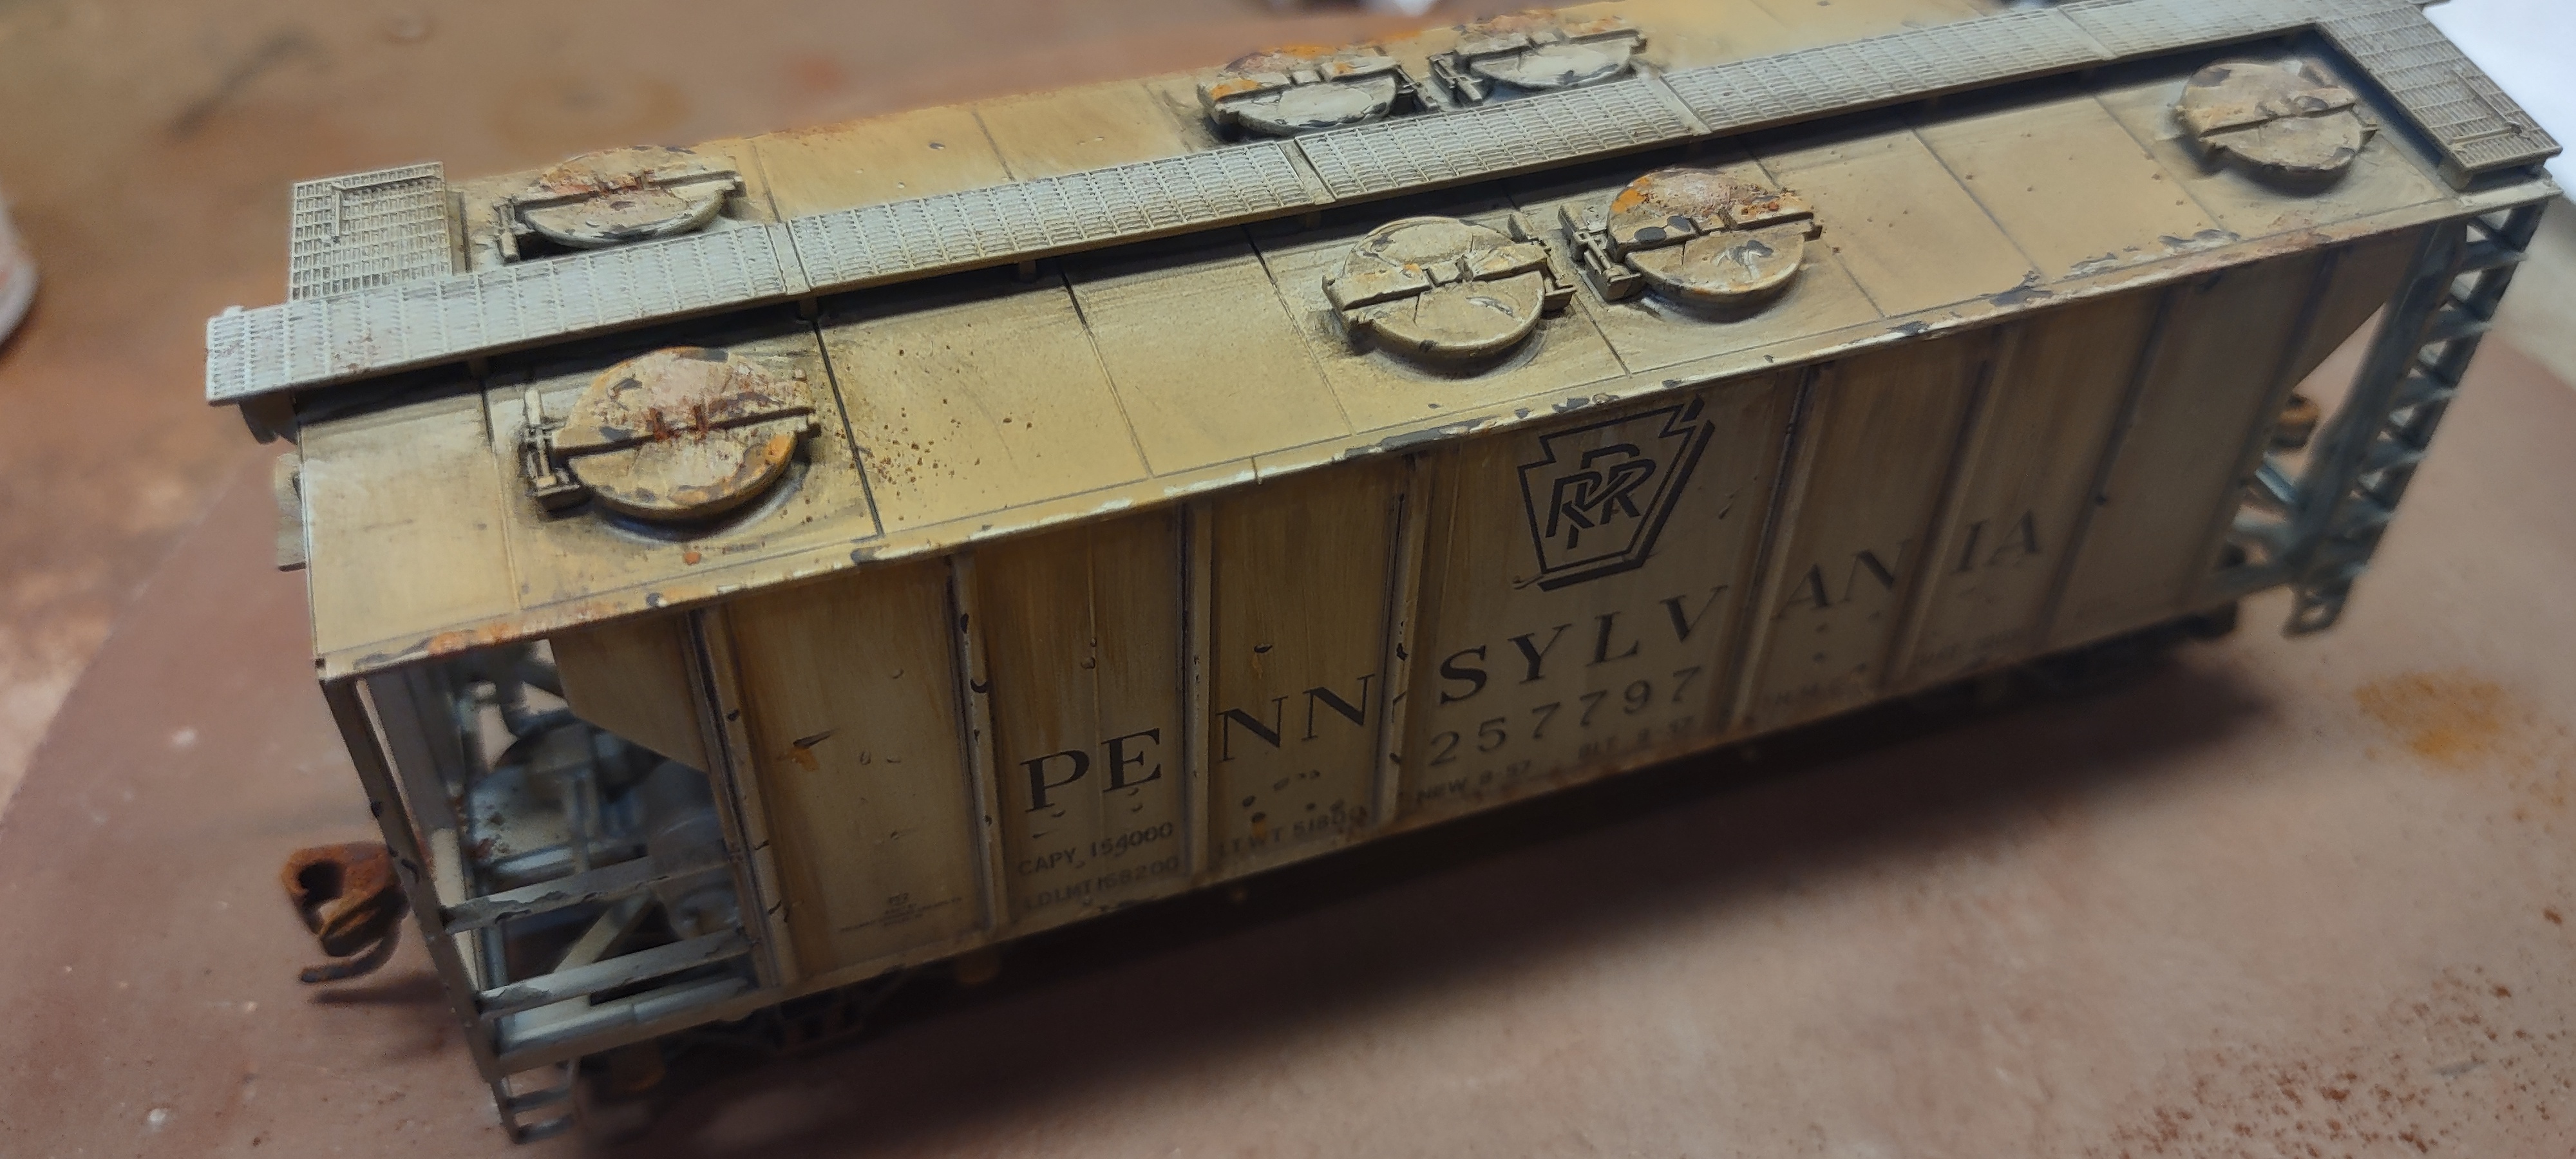
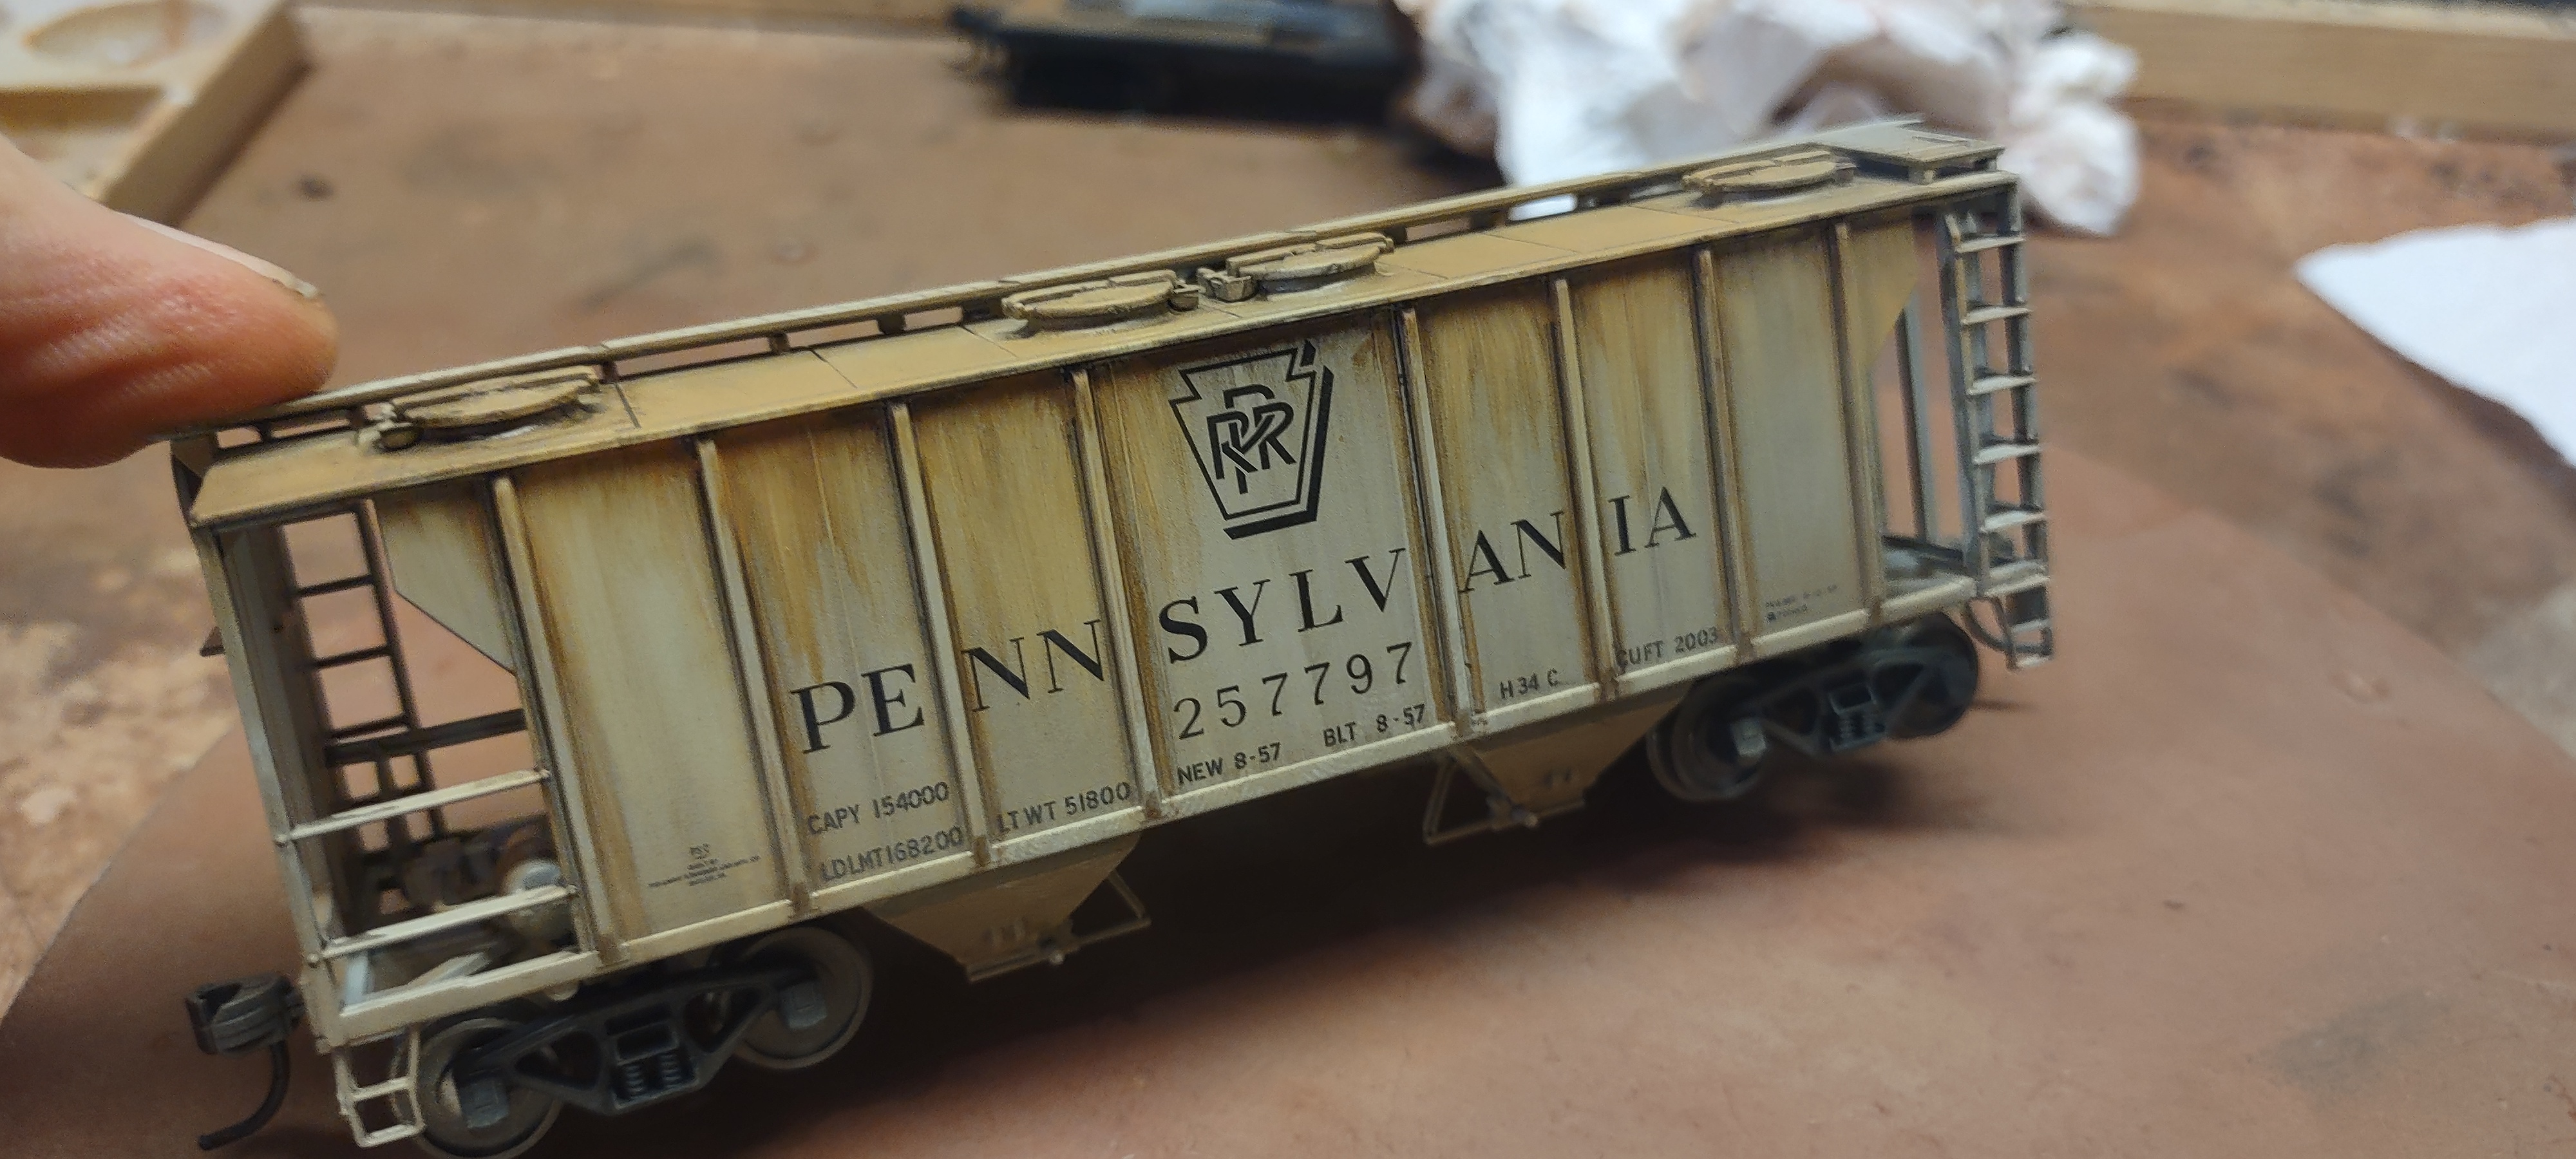
Generic weathering is not that. Generic weathering simply wants to make a shiny new model look more weather beaten. The two photos of the Pennsylvania covered hopper.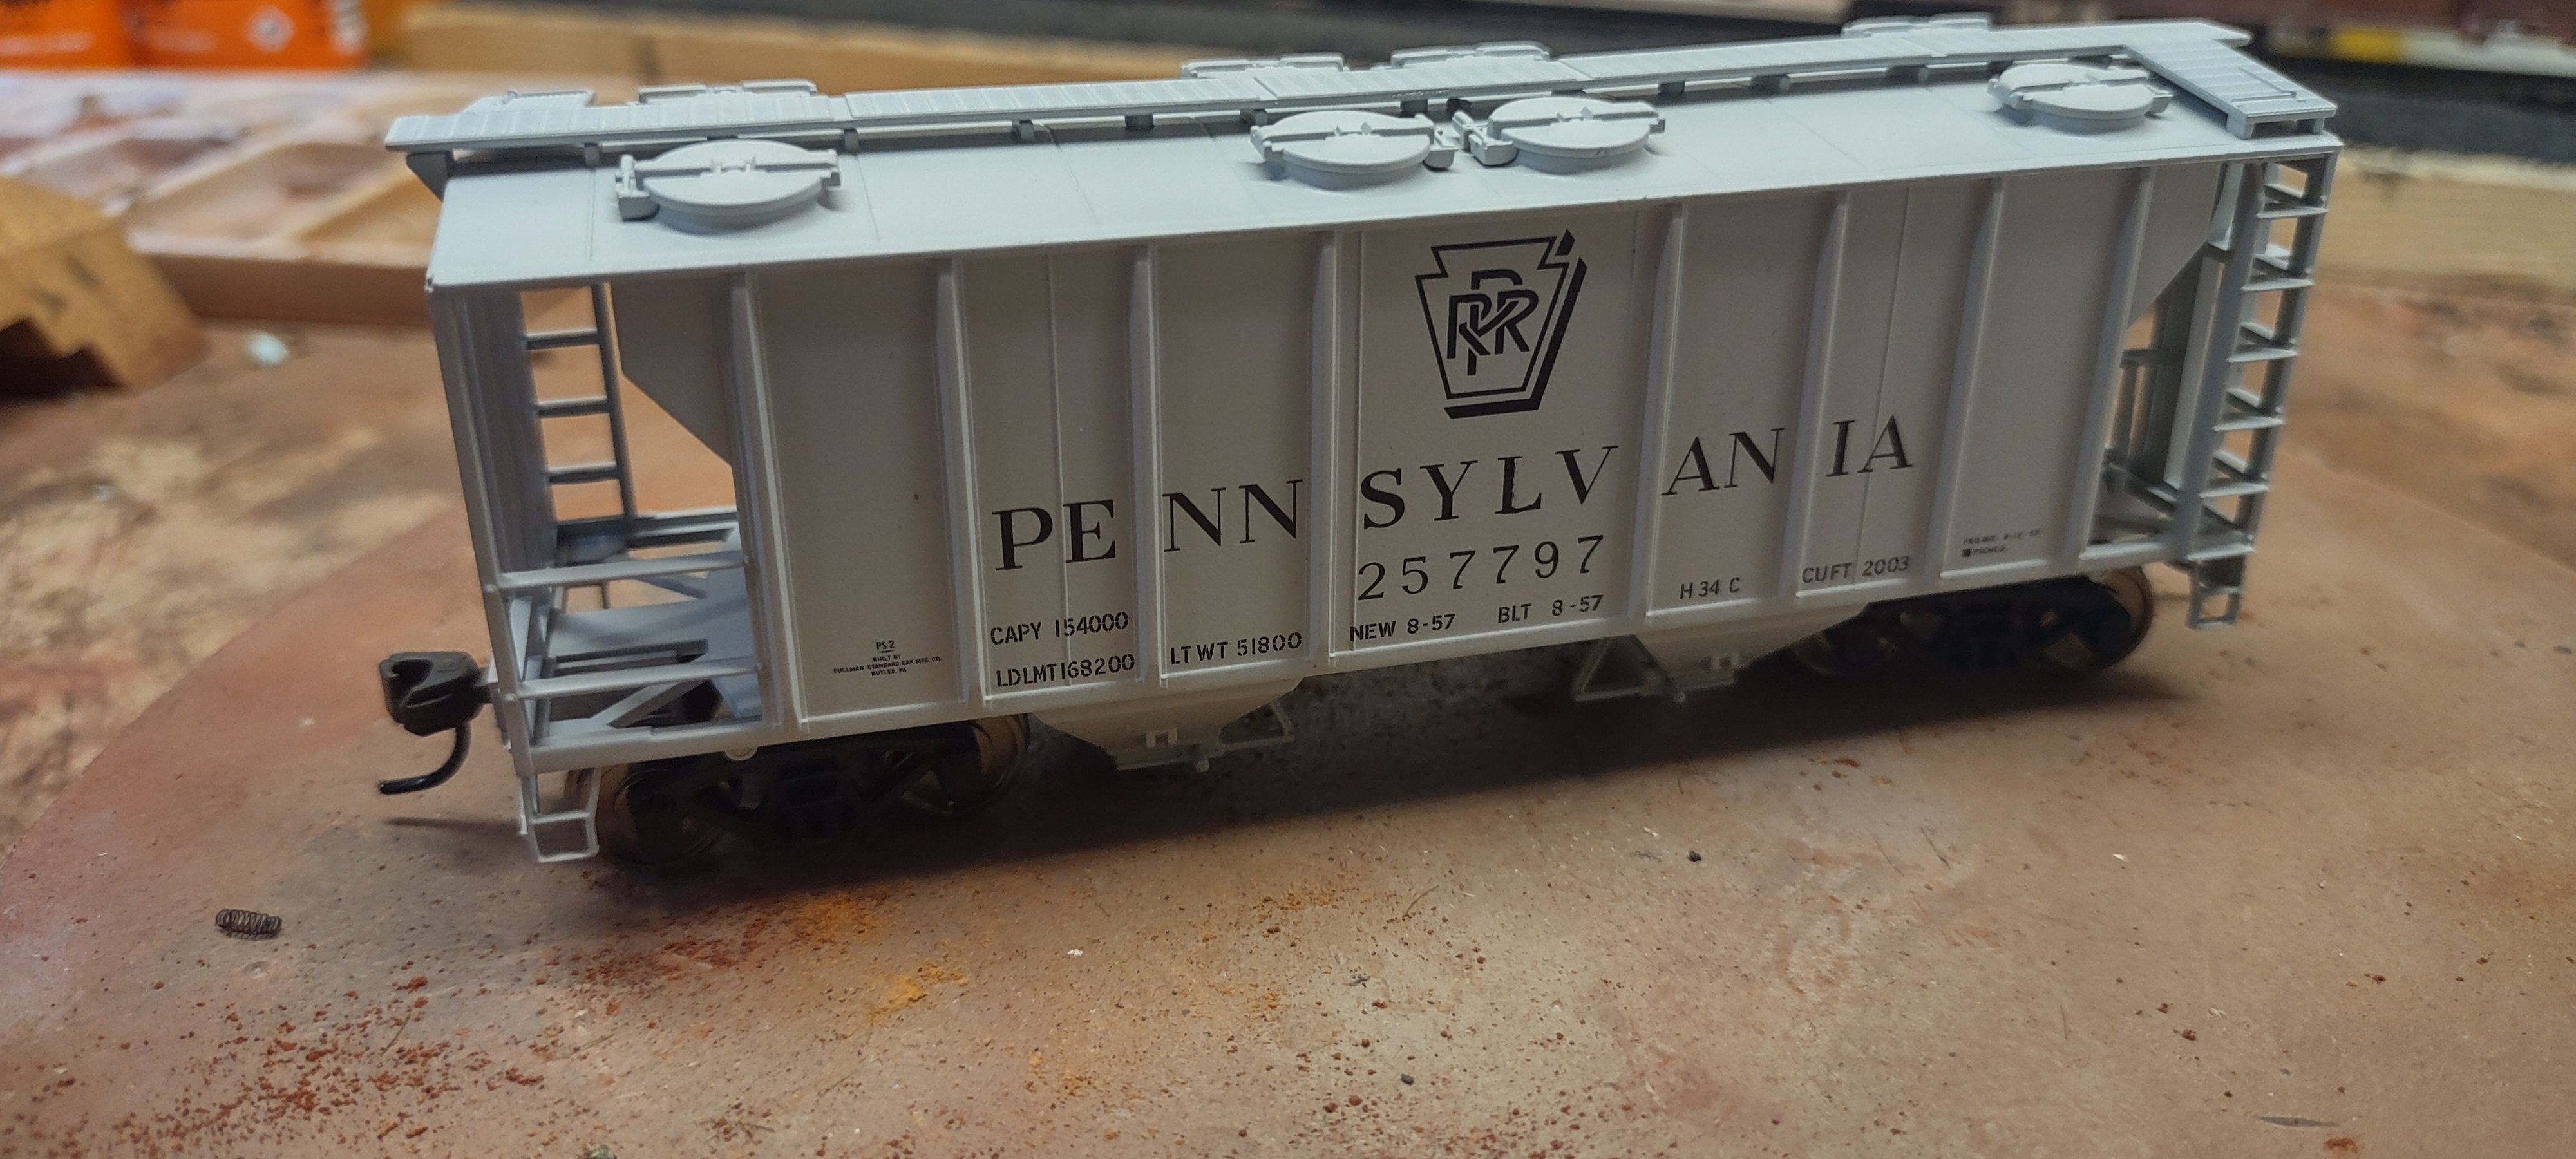
 Weathering Techniques for Beginners
If you search the Internet for information on weathering locomotives and rolling stock, you might get the idea that you need to buy an air brush and learn how to use it. Clearly an air brush can be a useful tool for weathering, but there are many modelers with nicely weathered models who have never handled an air brush. A beginning modeler can do a lot of nice weathering with pencils, chalks, weathering powders, and various washes. (Weathering powders and washes will be discussed in more detail in a moment).
To Spray, Or Not to Spray
Plastic and metal models possess non-porous surfaces that make it difficult for our weathering chalks, powders and pencils to adhere to securely. On the other hand, wood and cardstock present us with very porous surfaces that aggressively accept those same weathering materials. So, one warning is to apply those chalks and powders sparingly and carefully on those porous surfaces because once down they will sink into the pores of the surfaces and be hard to remove or blend into the surrounding areas of the model. As for how to help make the non-porous plastic and metal surfaces like our weathering chalks and powders better, there is a solution. Spray those surfaces with Testors Dullcote (a flat lacquer fixative) or a similar product from the art section of a craft or art store. Simply look for a flat or matte spray fixative. These, once dry, provide a little ‘tooth’ to help our powders adhere to the plastic or metal. They also help hide that 'new model plastic shine'. Some modelers also spray their models with the matte fixative again after applying the weathering powders. They do this to permanently ‘fix’ the powders to the surface of the model. This is not necessary on wood or cardstock models, but can be helpful on plastic or metal models, especially if they will be handled a lot. Just be warned that this second ‘over spray’ will significantly tone down your weathering efforts. Sometimes they almost disappear and require additional applications of the powders. When using any weathering powders, pan pastels, anything other than spirit based weathering washes and paints, you can only seal it with artist's fixative as any other spray varnish will make the weathering wash off. For what it is worth, all of the models shown in this section of the Guide were in use on a model railroad, and none of them received an overspray of fixative after they were weathered. Weathering with A Pencil
When talking about using a pencil to weather a model, we are talking about a pastel pencil. The ‘lead’ in a pastel pencil feels softer and oilier than a normal colored pencil. On a plastic model it can be spread and blended with a sponge eye shadow applicator.
- Commercially Available Weathering Powders
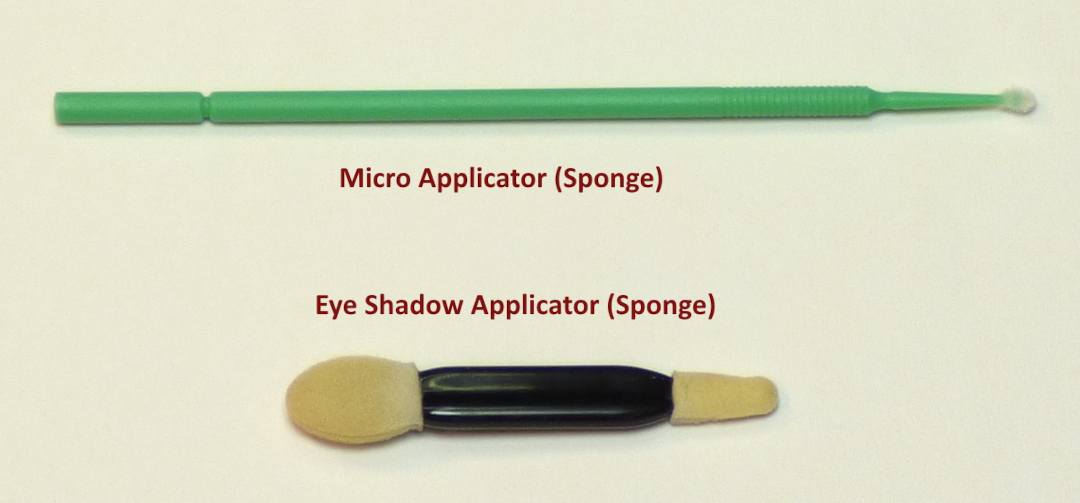
To apply these powders to your model, you can use an assortment of paint brushes of different widths and degrees of softness. Once used for applying these powders, you should not use them for paints. They will begin to wear down from the abrasive nature of the powders and their bristles will start to get ragged. Also helpful in applying weathering powders are Eye Shadow Applicators and Micro Applicators, both equipped with sponge tips. We have already talked about the Eye Shadow Applicators. The Micro Applicators can be found in some craft stores and on the Internet.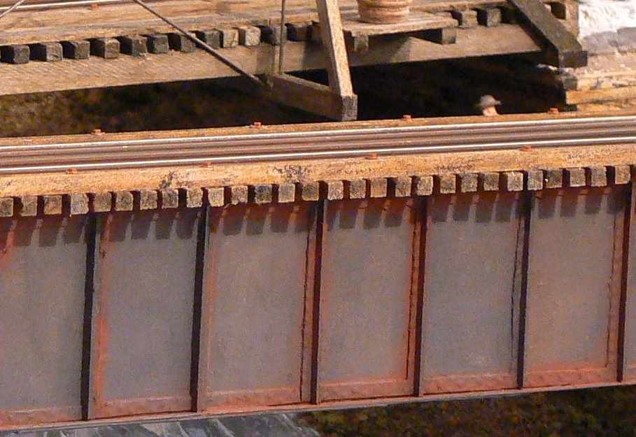
The girders on the bridge in this photo were weathered with a rust colored commercially available weathering powder. The powder was applied with a Micro Applicator and lightly blended with an Eye Shadow Applicator.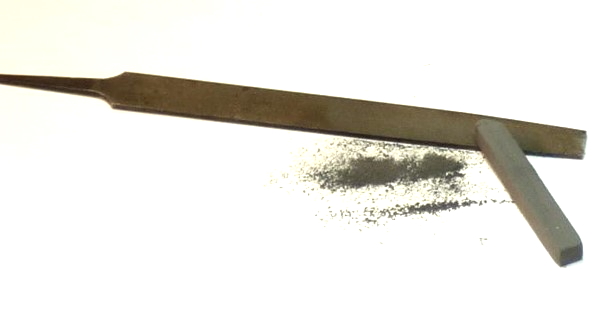
- Powdered Artists’ Chalks
You can make your own powdered chalks for weathering by taking a stick of chalk and rubbing it gently on a medium sized file. Unlike commercially available weathering powders, powdered chalk will not contain an ingredient to help it adhere to the surfaces of our models.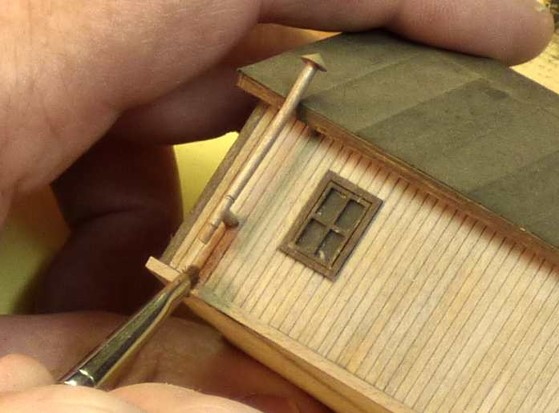
Thus, they are most useful on models made of wood, cardstock, or some other porous material such as plaster. You can store your powdered chalks in small clear plastic containers sold in all craft stores. The applicators used for powdered chalks are the same as are used for commercial weathering powders.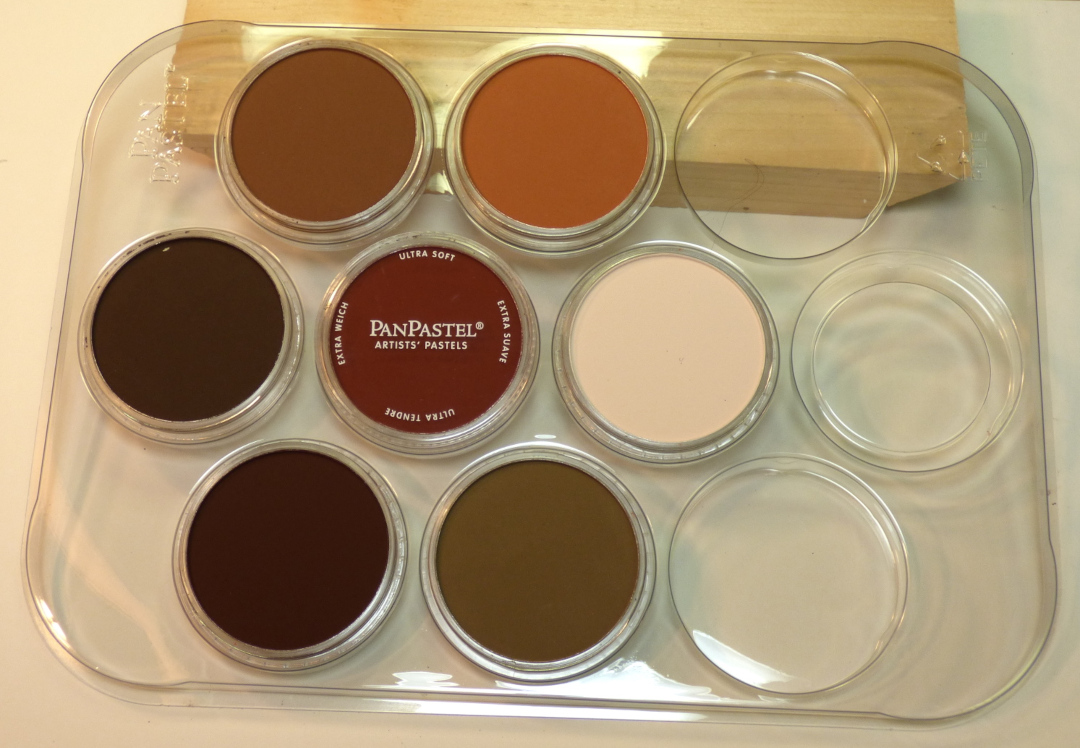
- Pan Pastels®
Compared to powdered chalks and the commercial weathering powders mentioned so far, Pan Pastels® are a recent arrival on the model railroad weathering scene. They are not so much a powder as a cake of a soft colored pastel material that feels oily to the touch. It comes in individual tins, or in multi-colored collections such as the one shown here. This collection appeals to model railroaders because it contains a number of colors that represent rust, dirt and grime. (Once again, if you search the Internet, you will find plenty of sources for Pan Pastels®.)
The best applicators for Pan Pastels® are the Eye Shadow Applicator and the Micro Applicator. Use the first for large areas and the second for getting the pastels into tight corners or small spaces.
Weathering with Washes
Washes can be classified by the liquid used to form the wash. Three of the more popular liquids used are rubbing (Isopropyl) alcohol, water, and Mineral Spirits. We will look at these three types of washes in the paragraphs that follow.
The underlying concept of using a wash as a weathering technique is that a pigment is mixed with the appropriate liquid, usually with a large proportion of the liquid to a small portion of the pigment, and then spread over the surface to be weathered. The liquid then evaporates with time and the pigment is left behind on the surface of the model.
- Alcohol Washes
As already mentioned above the alcohol used is Isopropyl (Rubbing) Alcohol. Found primarily in grocery stores and pharmacies, it is usually found in two strengths in the US: 70% and 91%. Although both can be used when making a wash, these washes are often used on wooden models, and the 91% strength has a lesser risk of warping the wood. (91% means 91% Alcohol and 9% water.) A greater strength of alcohol also means quicker evaporation.
The usual pigment mixed in with the alcohol is India Ink. Black is the dominant color used for weathering, and Higgins is one of the leading brands in the US. This ink can be found in Craft Stores and most Stationary Stores. (Windsor & Newton is a popular brand of India Ink in the UK.) A pigment that is a distant second is leather dye (not leather polish). We will focus on the Alcohol and India Ink mix, commonly abbreviated as A&I.
A good basic mix to start with is 2 teaspoons of India Ink to a pint of 91% Isopropyl Alcohol.
Let’s say that you are weathering the wall of a building or the side of a boxcar. Take a soft artist’s brush, dip it in the mix and flow the mixture down the side of the building or car in the direction that rain would fall off the roof. It will soon evaporate and leave the pigment behind. More pigment will accumulate along ridges like battens on a building or external ribs or rivet lines on a piece of rolling stock.
This picture will give you a better idea of what we just discussed. The wall was painted a cream/beige color and then an A&I wash was applied. See how the pigment is more defined along the vertical battens? Also note that it no longer looks like a newly painted wall.Tamyia flat white airbrushed

On the other hand, if you want to make something look milky white, like the roof of this refrigerated car, you now know how to accomplish it.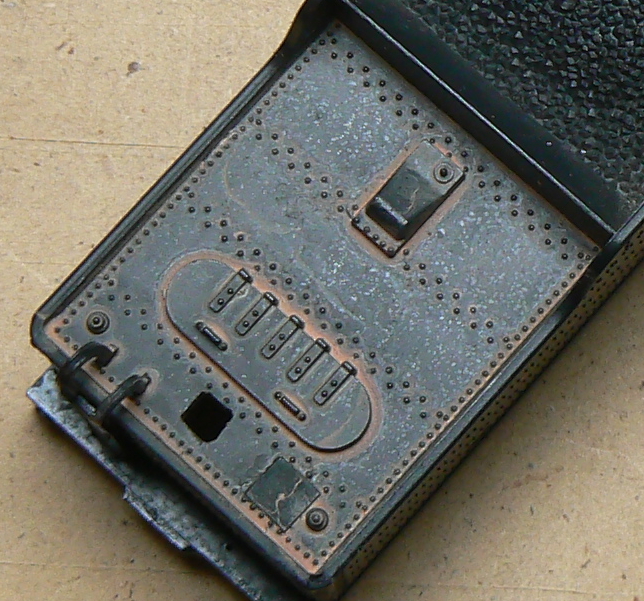
- Water Washes
The deck of this tender was weathered by using the first method. A rust colored water-based paint was mixed with water and then a soft, medium sized artist’s brush was used to flow the mix over the deck. (A good rust color usually consists of a mix of an orangey color with a brown color.) When the water evaporates, the rust color is left, especially along ridges and rivets.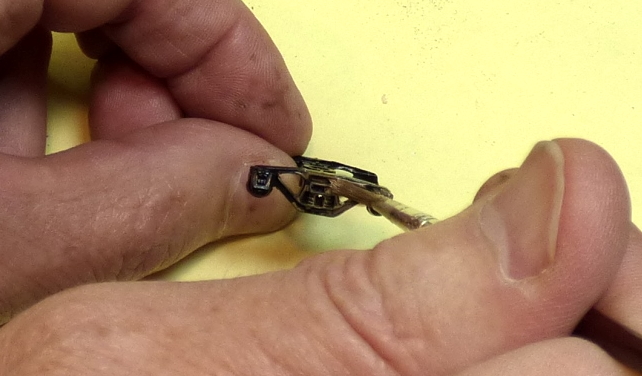
Here is the second method being used to weather the side frames of these freight car trucks. The brush was dipped in a rust colored water-based paint and then into a container of water before being run along the trucks. Once that water evaporates, the rust color will be left in all the nooks and crannies.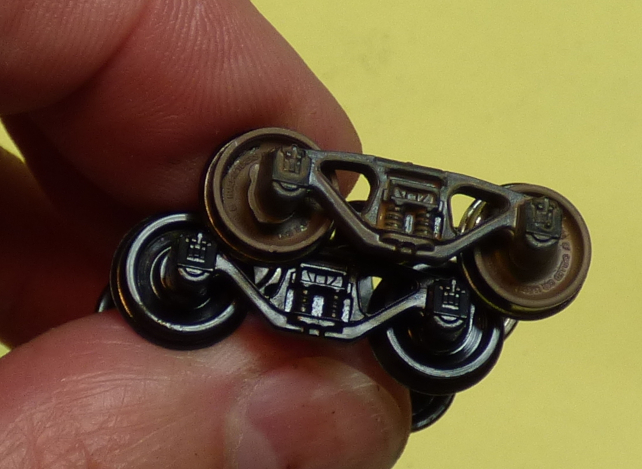
The same approach can be used on the outsides of the wheels themselves, yielding these results. Notice the striking difference between the weathered and un-weathered wheelsets.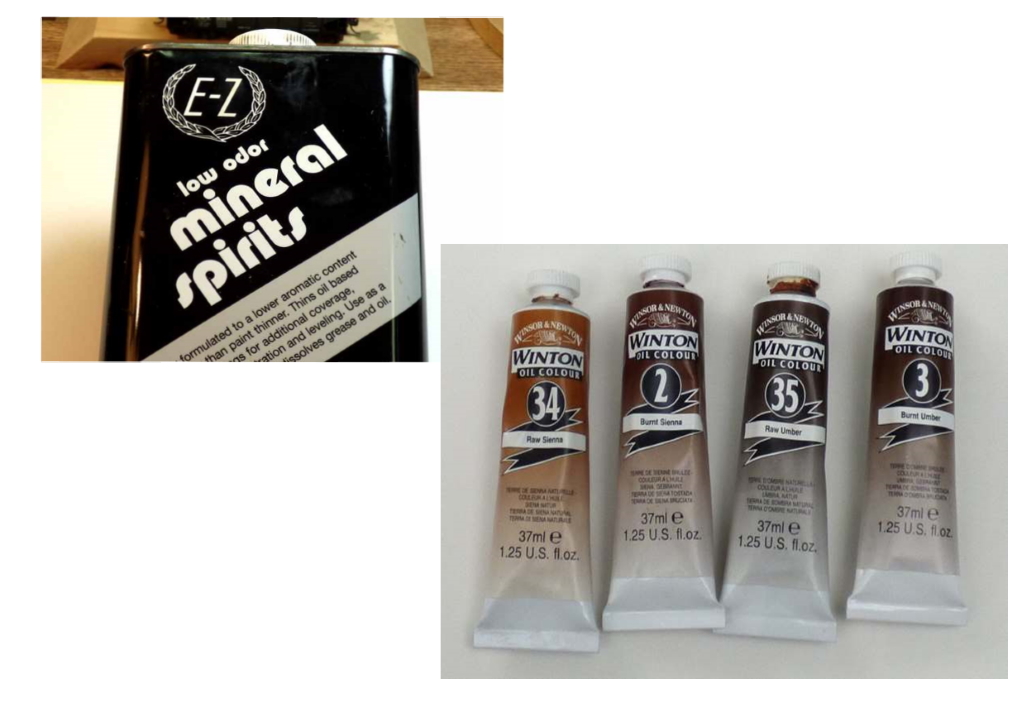
- Mineral Spirit Washes
In broad strokes, here are the steps used to weather with mineral spirits:
- Put a small dab of tube-based artist’s oil near top of surface to be weathered.
- Dip soft flat brush in odorless Mineral Spirits
- Draw the ‘dab’ down the surface in direction that water would flow
- Keep working it until you get desired results
Here are some of the supplies needed to weather with mineral spirits. There are now a number of ‘odorless’ or ‘low-odor’ mineral spirits available on the market. Choose one of those and follow all manufacturer’s cautions for use.
Also get a few small tubes of Artists’ Oils in a tube. The umbers and siennas are good for simulating rust. Black is another useful weathering color. Art supply stores or craft stores should have a selection.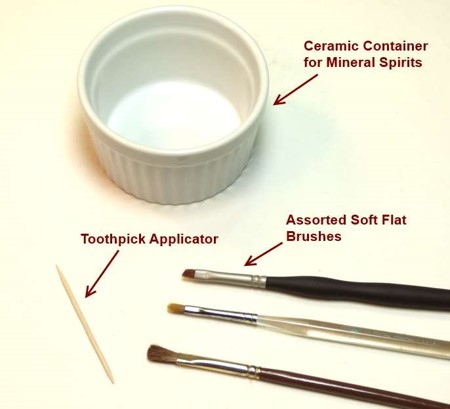
Useful equipment is shown in the photo. A ceramic container is better than a plastic container since it is less likely to tip over and also less likely to be affected by the mineral spirits.
Simply put a little of the mineral spirits into the ceramic container, place a dab of the artists’ oils on the model where you want some rust, dip the brush in the spirits and draw it down through the oils in the direction that rain would run. The following photos show the process.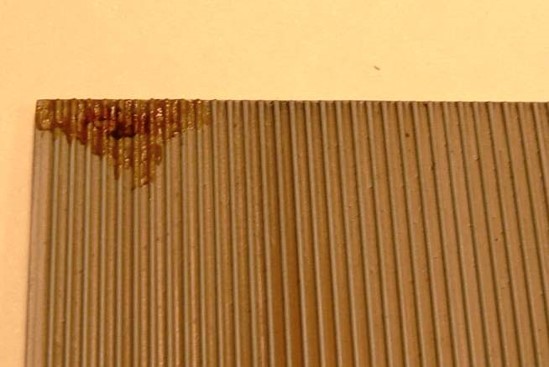
Here a dab of artists’ oil paint had been placed in the upper left corner of the wall. The wall is made of styrene plastic and has previously been painted grey.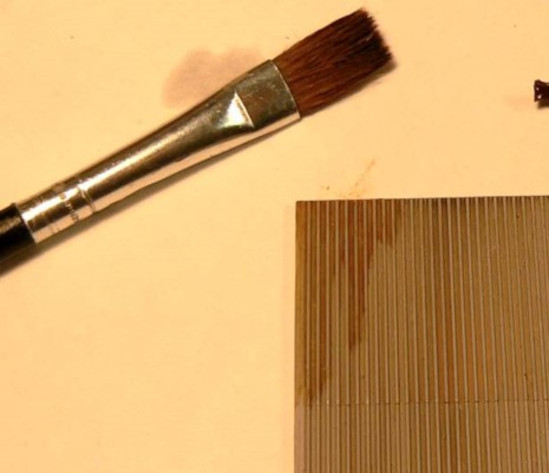
Here a soft flat brush has been dipped in the mineral spirits and has been ‘drawn down’ through the dab of oil from top to bottom. The process has been repeated until the desired look is accomplished.
The nice thing about this process is that it can be totally erased – even after a day or two. Simply apply more mineral spirits and wipe it all off with a cloth.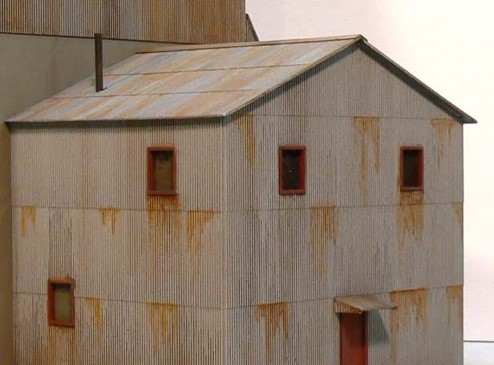
All the rust effect weathering on this plastic structure was accomplished with the method described above.
Putting It All Together
One of the first questions we asked was, “Why weather at all?” The answer given at the time was to help create a sense of realism. 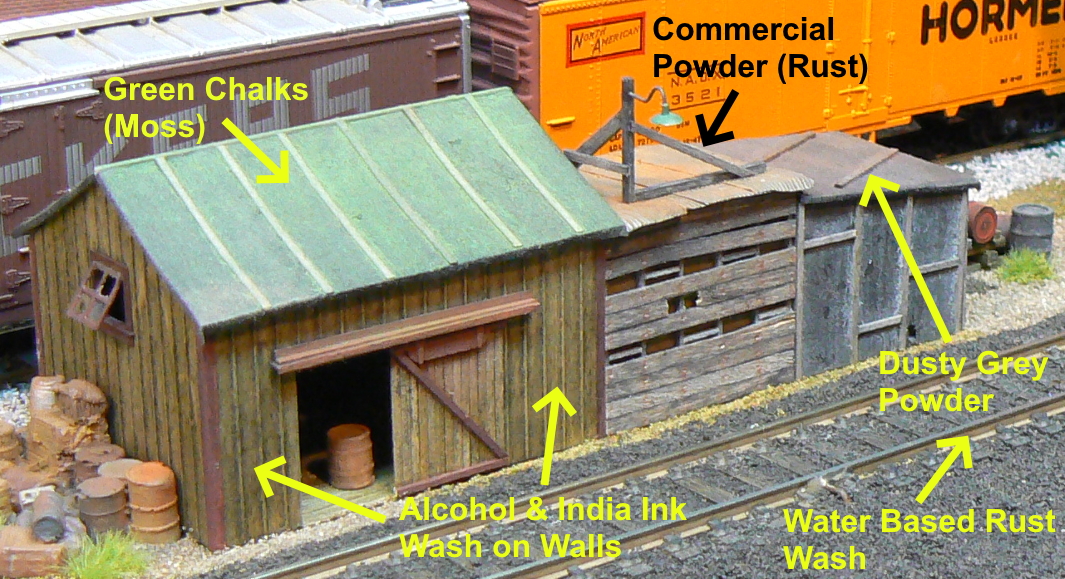
Now look at this little scene. The scratch-built series of sheds as well as the track and detail items were weathered using the techniques we have just discussed. In each case the weathering technique chosen depended on either the type of surface being weathered (tar paper roof vs. metal roof) or for convenience of application (wash on walls and sides of rails). Now look at the refrigerated rail car in the upper right-hand corner of the photo. Right out of the box. It looks unnatural in comparison.
So why not give weathering a try!